Friday, October 20, 2023

Time for Some Change - Halloween Pillow Update

I made these pillows many years ago with a craft group that I ran at the time. 

I get complements on them every year. 


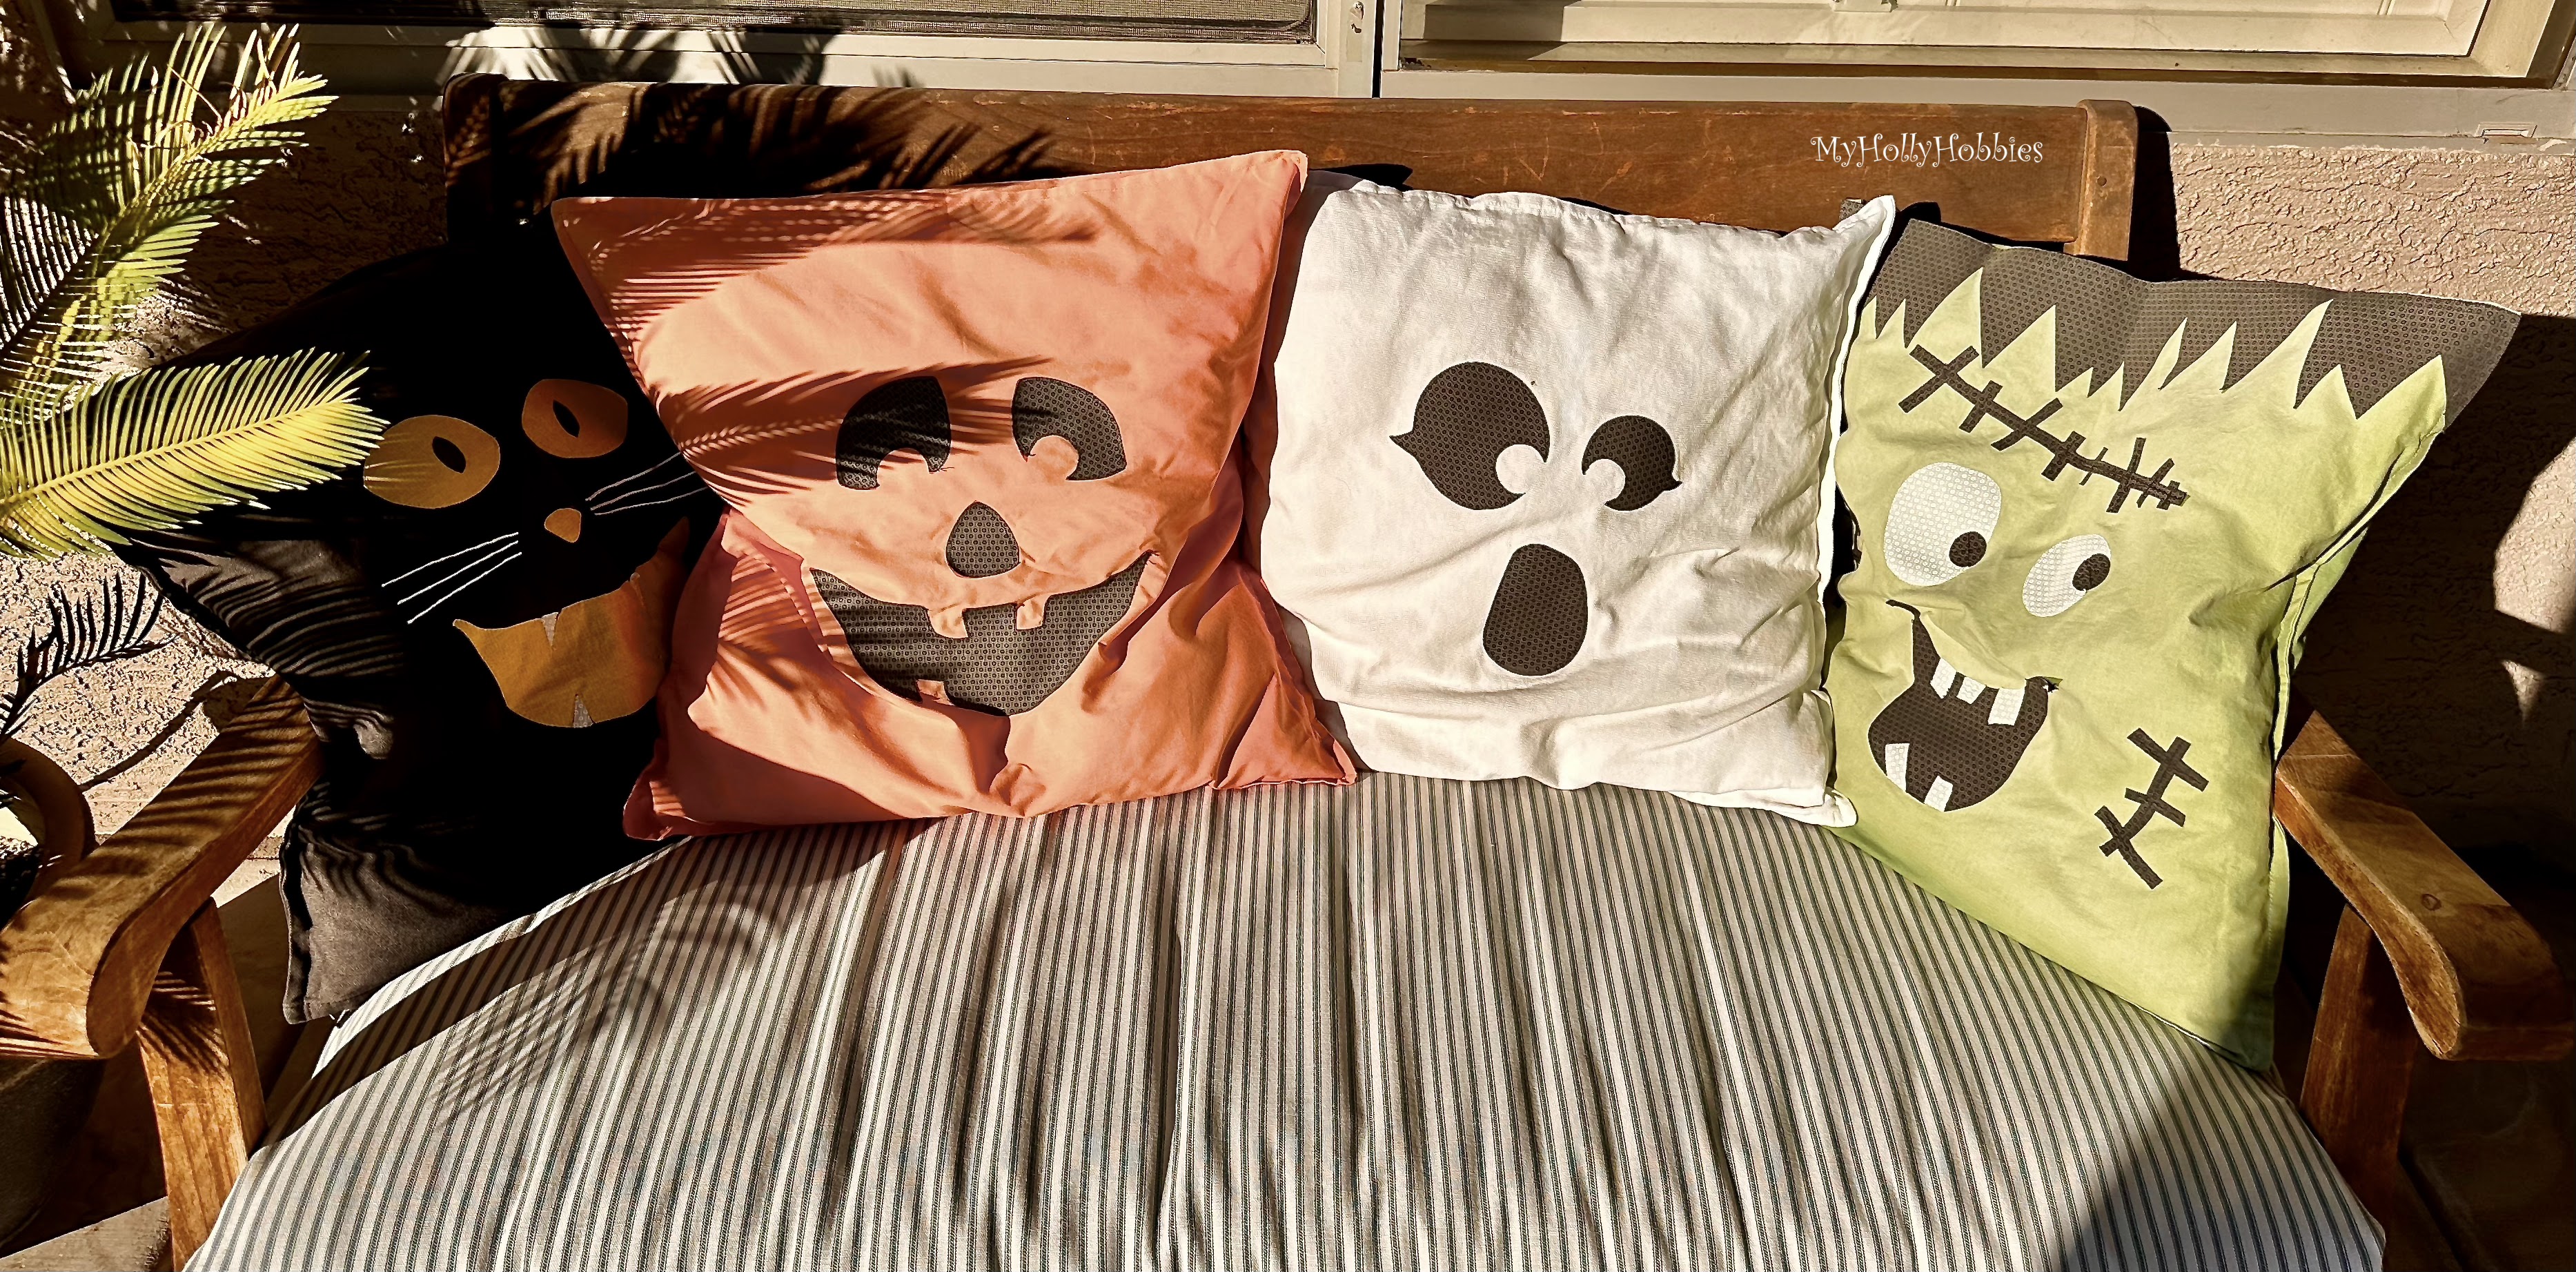
I got the inspiration from here. We used Gurli pillow covers from Ikea for the ghost and black cat.  They didn't have the colors needed for the jack-o-lantern or the Frankenstein, so I made those myself.  I made simple pocket pillow covers from cotton broadcloth.  I used small designed quilting fabrics to make the faces on each pillow. I used my Cricut to cut everything, some lightweight interfacing to attach them and then a basic stitch on the sewing machine around the edges to keep it all in place You can see it in the close up.

Unfortunately the Arizona sun is very hard on any fabric. As a result, they have faded a lot. 

So I thought I would update them this year.  My kids all like the Nightmare Before Christmas movie, so I created new ones based on the 3 main characters. 


I again used the Gurli pillow cover from Ikea.  This time they had green - huge time saver! Instead of using quilting fabric for the faces, I used a puff vinyl. It was extremely easy to use and I like the textured look it created. I used my Cricut to cut the vinyl. 


I'm not sure how the vinyl will hold up to the Arizona sun, but I thought I would give it a try.  Worse case scenario, I replace the vinyl with fabric in a few years.  I will keep you updated.

I LOVE how they turned out!  Hope you do too!

Happy Crafting!


Thursday, October 19, 2023

Long Time No See

I know it's been a bit - and then some.  I hope you have been crafting in my absence.  

Life has changed tremendously in our house.  Since my last post we had two foster children placed in our home. At the time they were ages 2 weeks and18 months. We then had the opportunity to adopt about 18 months later, which we did. They are now 10 and 12. They both have challenges that we deal with on a daily basis.  We are basically on first name basis with a lot of doctors and therapists now.  But I wouldn't have it any other way!!

I have also taken on a new job.  I have a preschool out of our home.  This allows for a little extra money and ability to take the kiddos to their various appointments.  

With their addition and the addition of the preschool, I haven't had the opportunity to be as creative. I'm hoping that now that they are older that will change.  

We have a 2400+ square foot two-story home. Over the summer I began a transformation. First up, repainting the entire inside of our home. Including the ceilings.  I have also changed out the baseboards as I have painted each room.  So far the entire upstairs is done - 4 bedrooms and 2 bathrooms.  Hopefully I will get started on the downstairs soon.  Before I get there though, I have to do some holiday crafts.  I will post about each of those as I finish them. I have one done and should have others following soon. 

Now back to the search for some supplies. 

Happy Crafting!


Monday, December 24, 2012

Grandparent Gift

I have been trying to figure out something for my mom for Christmas. All she says she wants is family pictures, which is a great and easy gift. But since all 4 of my siblings and their families are going to be at my parents for Christmas - the first time in over 8 years - we are having family pictures taken. So I wanted to do something different. I searched Pinterest and nothing caught my eye. So I googled "DIY grandparent gift ideas". I came across this blog that had a bunch of ideas.  But this one jumped out at me: 

I loved the idea, but knew that waiting until the last minute like I have, I wouldn't be able to order it, plus I know that I could create something similar. So here is mine:
I used Photoshop Elements 8 to create it. I have tons of digital scrapbook files, so I selected a background and started playing. I'm not very proficient with Photoshop Elements, so it did take me some time to play around and make things work. I am so excited with how it turned out. I sent it to Costco to print and put it in a 12x12 frame I picked up from JoAnn's Etc. 

I can't wait for her to open it on Christmas!

Happy Creating!
Holly

Monday, December 17, 2012

Neighbor Gifts: DIY Candles

I made 3 candles HERE for November craft group. My husband liked them enough that he wanted me to make more - 9 more to be exact.  The difference from from putting together the craft in October to making them in December is amazing. Plus the fact that I needed to make 9 of them. I didn't care to use the hot spoon variation, so I bought a heat gun (used in embossing) at Hobby Lobby-of course using a 40% off coupon. If you use a heat gun, just be sure you move it around a lot or it will cause the wax to come through the tissue paper and run down the sides.

 The candles I originally used were unscented from Hobby Lobby-because their Christmas stuff wasn't out yet. I found Winter Wonderland scented ones at Walmart. They were a tad bit more than those from HL because I wasn't able to use a 40% off coupon. But I wanted scented ones as gifts. I also found more options for the tissue paper. I added a few Hershey Kisses, changed out the sisal with tulle-because I had some on hand and I personalized the tag using my Cricut.

Thursday, December 13, 2012

Craft Group: Christmas Table Topper

So the Halloween Placemats were such a hit, that I decided to try the same technique and make table toppers for various holidays. I had some left over red burlap that I cut into 2 squares (they are about 22 inch squares). Using my Cricut, I cut vinyl stencils for each of the corners. After applying the vinyl to the burlap, I used newspaper and painters tape to cover the rest of the fabric. 
Here is the final results of one I made for Valentines Day and one for Fourth of July:
(sorry I was too lazy to actually iron them before I took the pictures)

If you look close at the stars, you will see crooked edges and the white doesn't look filled in. I had tried using acrylic paints with a fabric medium mixed in. It took I don't know how many coast and it still looks a bit pink. So when I did the hearts and the blue stars, I switched to using spray paint. Worked much better, but it still took a quite a few coats (just not as many as the acrylic paint). 

So when it came time to get things ready for December's Craft Group, I thought I would try using Duck Canvas instead of the burlap. I sewed a decorative stitch on the edge, like I had done with the placemats. And this time I wanted to try using freezer paper to make the stencils. If it worked, it would be a lot less expensive then the vinyl. So using my Cricut, I cut the designs in the freezer paper. Then ironed the freezer paper - shiny side down on the fabric. Then spray painted.
And the final product was a fail!  The freezer paper didn't adhere to the canvas so well, so there was over-spray as well as edges to the designs that just didn't look good.  It won't be a give like I hoped, but I was able to  "save" it to use on my kitchen table by using a black Sharpie and outlining it.
Fail #1:


So since that failed, I checked out other options on Pinterest. I came across one that used contact paper from the dollar store. Well that was a fail as well, but nothing could "save" this one. The contact paper didn't adhere well either, plus once you got spray paint on it, the edges would curl up, which only allowed for one coat of paint. Even one heavy coat of paint didn't work.
Fail #2:

What did work?
Using the stencils created from the contact paper and we painted them with acrylic paint. It took 3-4 coats and a little bit of touch up once the contact paper was removed.

But I did fail again
 by not getting a picture of the final product.
I need to make more for gifts, so when I do, I will add a picture.

Happy Crafting!
Holly