Yes now it's time for
About a year ago when I was visiting my sister in Seattle, I came across this quilt square from littlemissshabby.blogspot.com and thought it would make a really cute pillow for my daughter's daybed.
But rather than using a bunch of scraps to make it, I bought 1/8 yard of 5 different fabrics at my sister's favorite quilt shop. (Not cheap going that route). Well when I got home from my trip and showed her a picture and the fabrics, she told me she didn't like them - she wanted to change the colors of her room and have more black. Because none of the fabrics I bought had black, they stayed in the bag collecting dust. After making Thing 1 & Thing 2's pillows,
I decided that I was going to go ahead and make the one for Thing 3.
I used the tutorial (above) with a little change.
I used the strip quilt technique to put together smaller squares.
Fabric needed (if not using scraps):
1/8 yard of at least 4 different fabrics
1 yard of solid (this will also be used to create the envelope back)
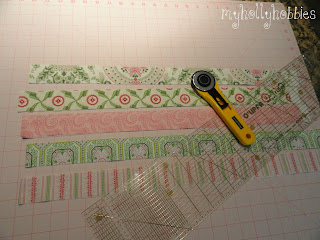
Cut fabrics in 1 1/2 inch strips.
Sew the strips together using a 1/4 inch seam allowance.
Press the seams all one direction.
Cut the sewn strips in 1 1/2 inch strips (going the opposite direction.)
Sew the strips you just cut together. From there I followed her tutorial.
To create envelope back:
Cut two rectangles the width of your pillow + 1/2 inch x half the length of your pillow + 2 1/2
My pillow ended up being 13x13 so my envelope pieces were 9 x 13 1/2.
Then follow the first four steps from this post here.
NOTE: If you follow what I did (5 x 5 square in the center) you will end up with a 13" pillow. Pillow forms come in even numbers-12, 14, 16, etc. I had to make my own pillow forms. I used muslin, cut it into 14x14 squares. I used 1/2 seam allowances. Sewed 3 complete sides and on the fourth side I left about 3 inches open. I then stuffed it will polyfil and sewed it closed.
Finished product:
No pictures of Thing 3's room - I can keep it clean long enough to get pictures. Next time it is, I will snap a couple and post them.


No comments:
Post a Comment